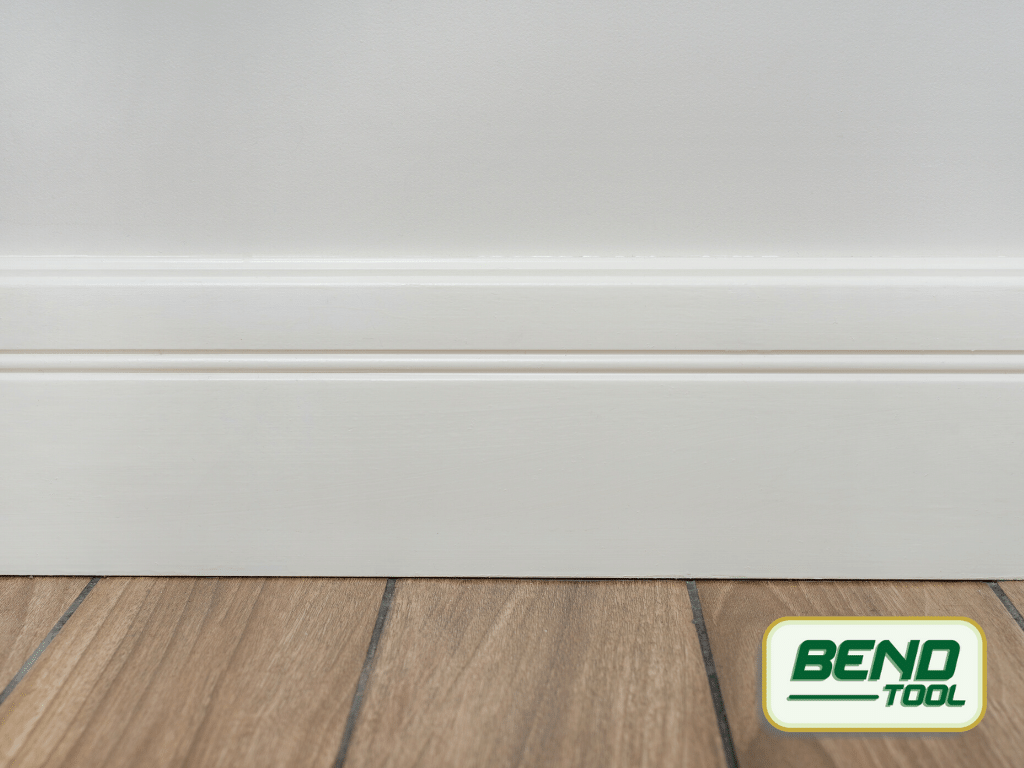
Painting baseboards can be more tedious than other painting projects. When compared with drywall, baseboards lack texture. Without texture any small blemish can become visible. However, when compared with cabinets, they are not eye level and may have some room for error.
When trying for a smooth, clean surface, materials and tools become more important. The proper paint can make all the difference. Further, if you’re painting baseboards that are already installed, you may be limited in how efficient you can be.
Not all projects are the same, we run through paint, materials, tools and anything you might run into – or ask – when you start your baseboard project.
PRIMING BASEBOARDS
Priming baseboards is important. It is the final step of preparation before painting the baseboards. All wood baseboards that will be painted need to be primed. Priming can help identify imperfections – or the severity of imperfections (think knots or dents in wood), giving you another chance to fix them before painting.
Things to consider:
Painting pre-primed MDF:
- You may be able to get away not priming – test your paint in any questionable areas first.
- Examine for scuffs, scrapes, and other marks. MDF is susceptible to damage.
Don’t overlook this step in the process.
- For most rooms: oil-based or water-based primer will work just fine. Oil-based primer is more effective in most situations
- For rooms with moisture (bathroom, kitchen): consider a vapor barrier primer.
You might not need to prime, only prime if
- you’re changing the color,
- you’re going from latex to oil paint, or
- too much paint wears off when you’re sanding/prepping.
SELECTING PAINT FOR BASEBOARDS
Choosing paint for your baseboards can seem overwhelming. But when you boil it down you need to make three decisions – type of paint, color of paint, and sheen. For most DIY’ers the only difficult part should be getting the color and sheen right.
Types of Paint:
Oil-based paint has long been the preferred paint of professionals. However, in the US and Canada regulations have been created to reduce the use of oil-based paints (see ‘volatile organic compounds’). Regulations have not eliminated the use. Oil-based paint with alkyds is still a popular choice for baseboards, cabinets, and other trim projects.
Water-based paint has not been popular among professionals. It does not have the same durability as oil-based paint, making it difficult to clean and maintain. Its primary benefits are that it dries fast, and it contains a low amount of VOCs, and because it is water-based, it is easy to clean up with just soap and water.
The best part about government regulations of oil-based paint is the creation of alkyd-acrylic hybrid paint. This combines the best factors of both oil-based and water-based paint, making it an excellent choice for baseboards.
Trim Paints
-
Brands:
- Benjamin Moore Advance
- Sherwin Williams ProClassic
- Behr Premium Plus (Paint and Primer in One, Home Depot)
- Valspar Door & Trim (Lowe’s)
BRUSH, ROLLER, SPRAY, OR PAINTING PADS
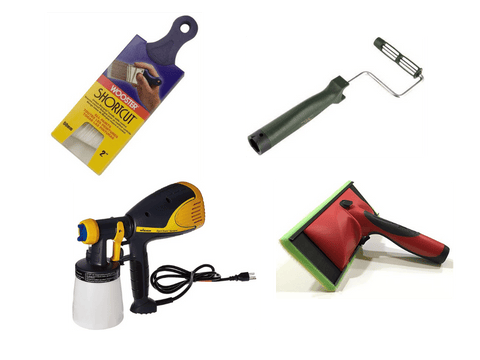
Brush
If you’re using a brush, you’ll want to consider purchasing:
- A flat brush 4’’ wide (depending on your baseboard) with a tapered edge, and
- A Sash brush, with angled bristles to help with application to the baseboard.
- Water based (latex) – nylon, polyester
- Oil based – nylon, polyester, natural bristle
- Alkyd-acrylic - confirm based on paint
Rollers:
Rollers consist of the handle and cover, or roller cover. Many options of roller covers exist. To test, simply run your hand over the roller to test for a consistent feel. If it has lumps, grab another one.
Despite some confusion, paint rollers are perfectly suitable for trim applications. For baseboards, a smooth to medium, 3’’ roller is suitable. Paint retail centers carry these in store.
Before using the roller, take painters tape then apply and remove any lint (nap) from the roller. This ensures it does not get applied to your baseboard.
Paint Sprayers
Paint sprayers mostly come in three forms; high volume and low pressure, compressed air, and propulsion.
For painting baseboards, the best paint spray option is High Volume, Low Pressure (HVLP) sprayers. HVLP works great in small areas like baseboards, trim, casings. Most models have different nozzles for different types of paint.
Check the manufacturers recommendations for how to use your type of paint with a paint sprayer, some recommend thinning paint first.
Another option is a compressed air sprayer. They spray fine, light layers of paint, and are great for creating smooth surfaces on baseboard and trim. However, they are usually too expensive for a one- time job. Consider renting one from a home center if you prefer this option.
Painting Pads
Painting pads may seem tempting for painting baseboards. Their square surface fits most baseboard heights. In some cases, you can achieve a smooth finish. For painting baseboards, painting pads are best used for edges and any surfaces that may be difficult for a brush (e.g., a 45-degree inside corner).
PREPARING TO PAINT BASEBOARDS
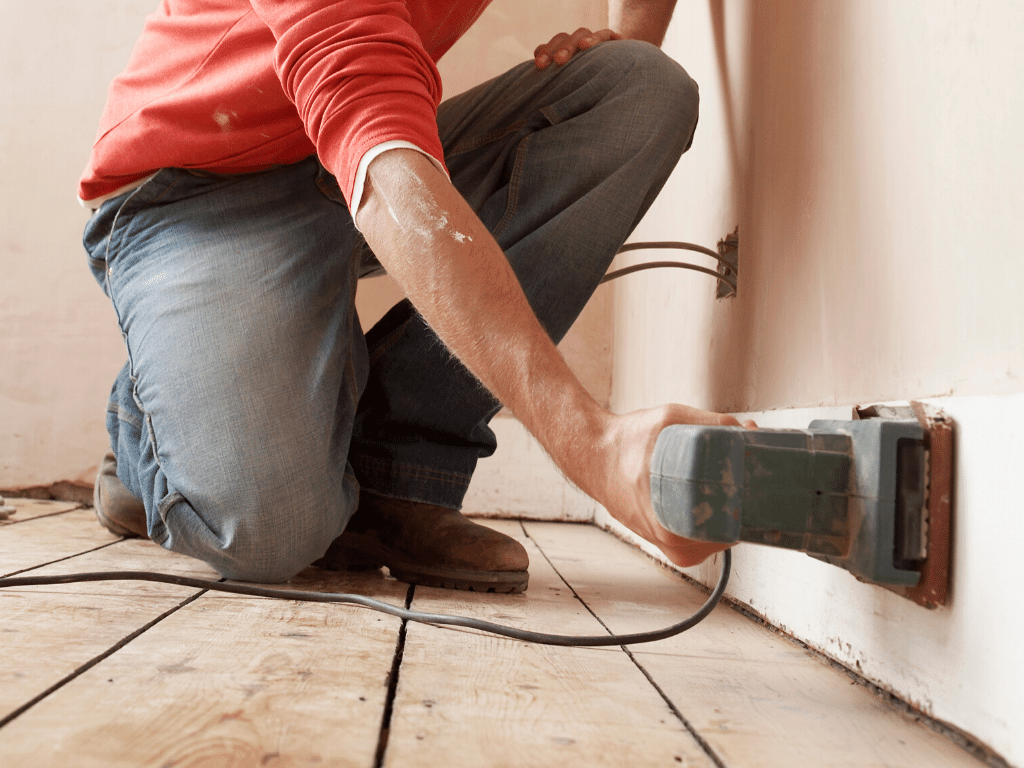
A quality paint job is often determined by the amount of preparation. Spare yourself from stopping mid-project to patch something you forgot, or sand something you missed. This only delays your finish time and puts the quality of your work at risk.
PAINT APPLICATION
Using a Brush:
- Loading Paint: Dip the brush into the paint no more than 1 inch, or half the bristles. When removing the brush, TAP it against the side instead of wiping it the excess paint.
- Brushing Paint: Try to use long, straight strokes along the baseboard. Instead of running along the baseboard in one direction, paint one direction, and then after applying more paint, work backwards into where you left off. This keeps paint from grouping. If using wood, always work the direction of the grain.
- Tipping Off Paint: Professionals use this method, they gradually lift the brush off of the board, separating the bristles from the paint and board leaving a nice, clean look each time.
Using a Roller:
- Loading Paint: Dip the roller (not all of it) into your pan, pull it back and run it along the grooves, or use your screen if you purchased one.
- Rolling Paint: Try to manage the paint to run for two parallel strips along the baseboards.
- Smooth the Paint: Run over the strips with your roller, this helps smooth the paint and keeps the roller from getting too much paint on it which is difficult to manage.
Technique is dependent on your type and model of paint sprayer.
Use these general tips for best results:
- Use a steady, even wrist for each pass.
- Don’t keep your finger on the trigger for too long, or too much paint will come out.
- Thin the paint before loading it into the sprayer.
For the best results when painting in place, dedicate time to preparation. For more information about situations you might run into, see our other articles:
Painting Outside:
Wind with Paint Sprayer. Don’t underestimate the power of the wind. You could end up with some very upset neighbors.
Baseboard Paint Project Supply Check List
- Paint
- Brush (flat 4’’ wide brush, sash brush with angled bristles, bristles depending on paint type), and/or
- Rollers (Trim Rollers), or
- Paint Sprayer
- Roller Screens (if using rollers)
- Roller Pans (use a sturdy, metal pan)
- Tape (scotch blue, by 3M)
- Drop cloth
- Bucket, rags (dry and wet), dish soap
- Sponge
- 5 in 1 tool, putty knives, paint scrapers
- Sandpaper, Sanding blocks
- Microfiber towel, tack cloth
- Paint Guide
- Eye protection
- Respirator
- Work lights
Download our handy baseboard paint project supply check list here.